Exporting and Importing a Backup of your Mailbox in Mac Mail
Creating a backup of your mailbox is required when migrating your hosted email services.
Exporting a backup
- Open the Mac Mail app.
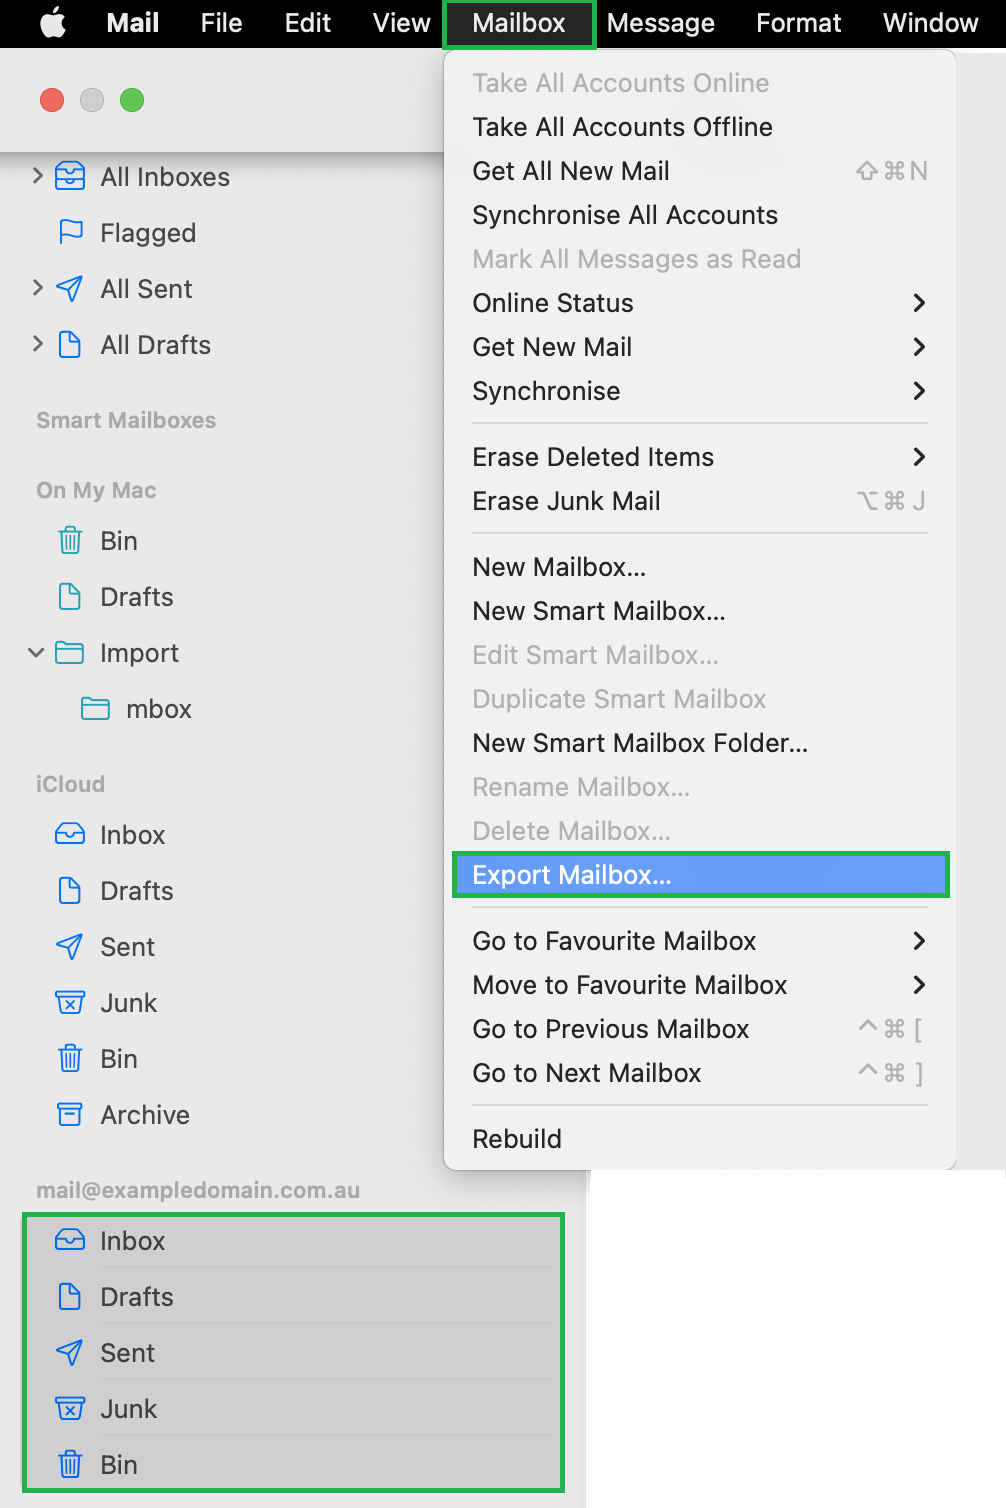
- Select the contents of the mailbox by clicking on the top folder, holding down the Shift key, then clicking on the bottom folder.
- While these folders are selected, hit Mailbox > Export Mailbox in the top menu bar.
- Choose or create a destination folder to save your backup, then click Choose.
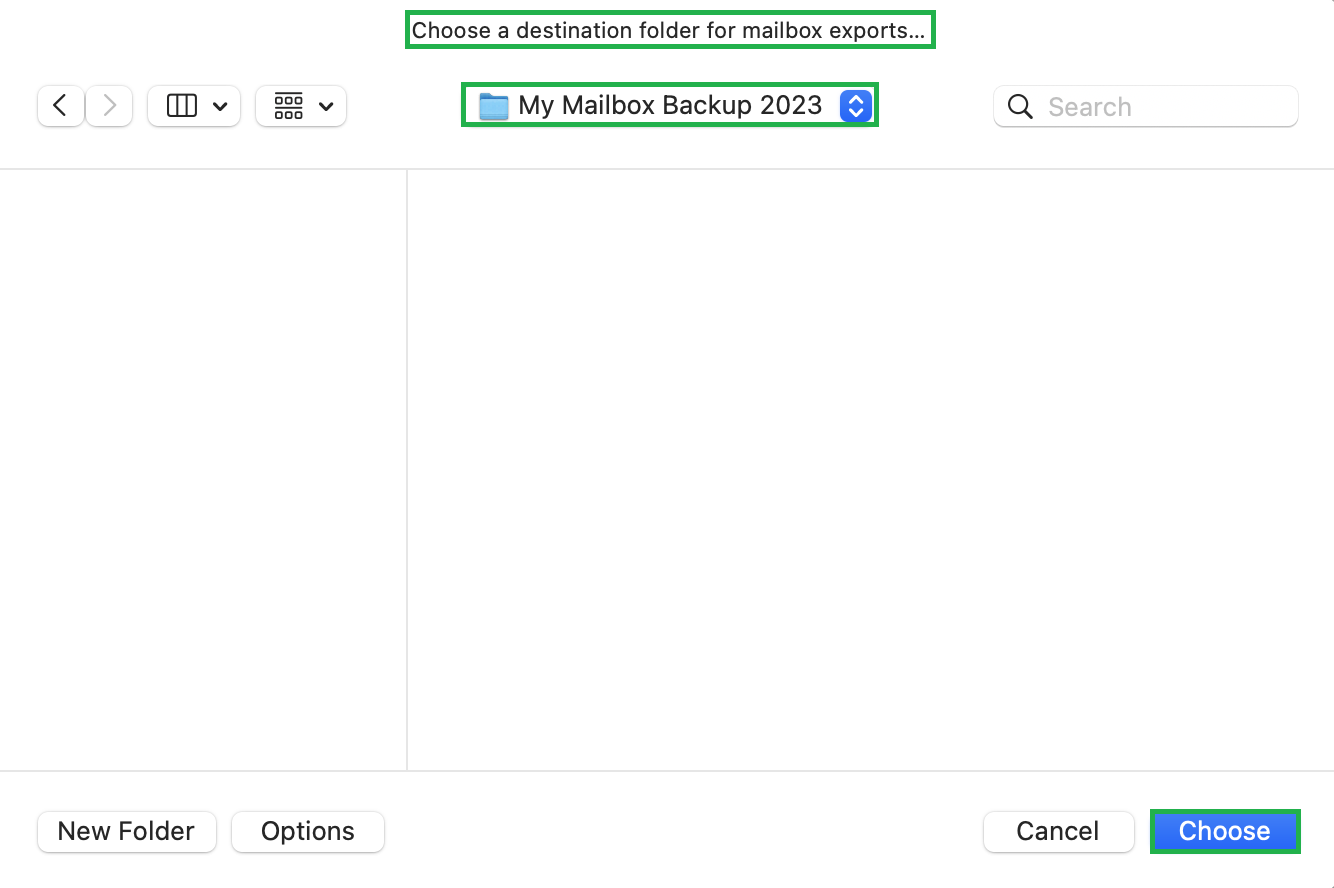
- Mail exports the mailboxes as .mbox packages. If you have previously exported a mailbox, Mail won’t overwrite the existing .mbox file. Instead, it will create a new .mbox file, e.g. “My Mailbox 2.mbox.”
- Mail won’t notify you when the backup is completed. For larger mailboxes, it’s best to leave the program running overnight to ensure all data is exported.
Once your backup is exported, we recommend that you import the backup to ensure it contains all of your files and folders. Once you have done this, it’s safe to remove the existing version of the mailbox and replace it with the details from your new email host.
Importing your backup
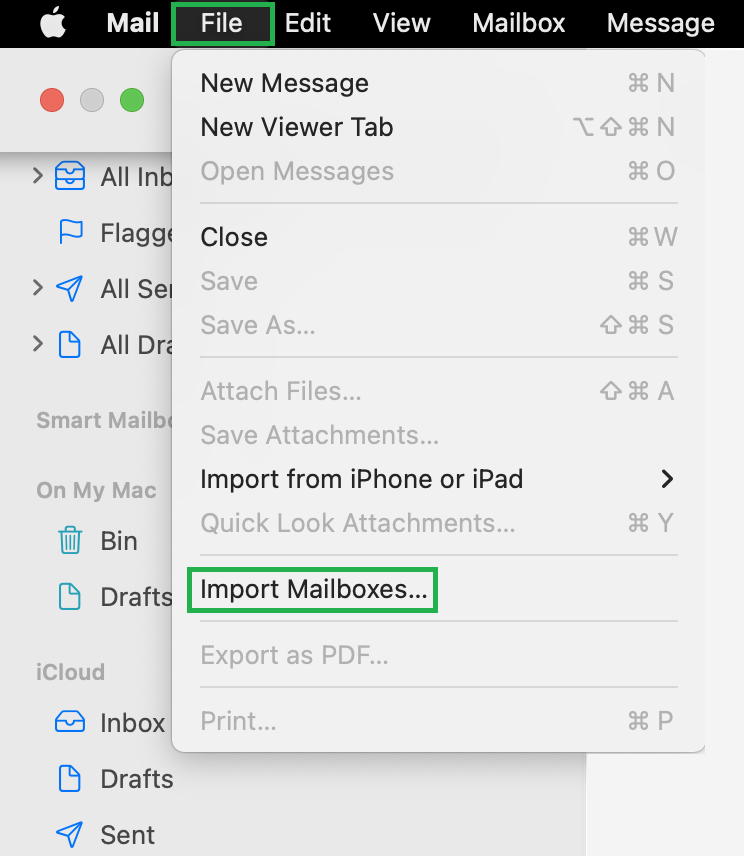
- To import the backup, select File > Import Mailboxes.
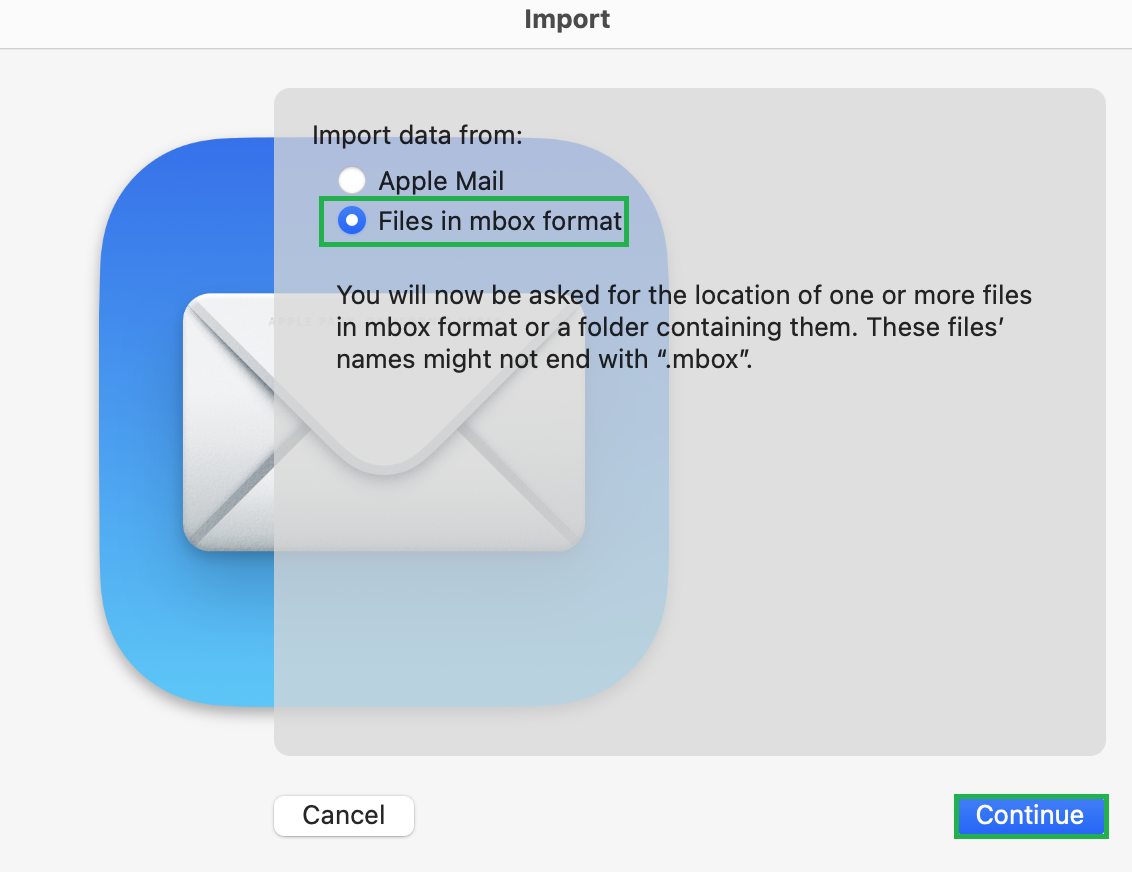
- Select Files in mbox format and click Continue.
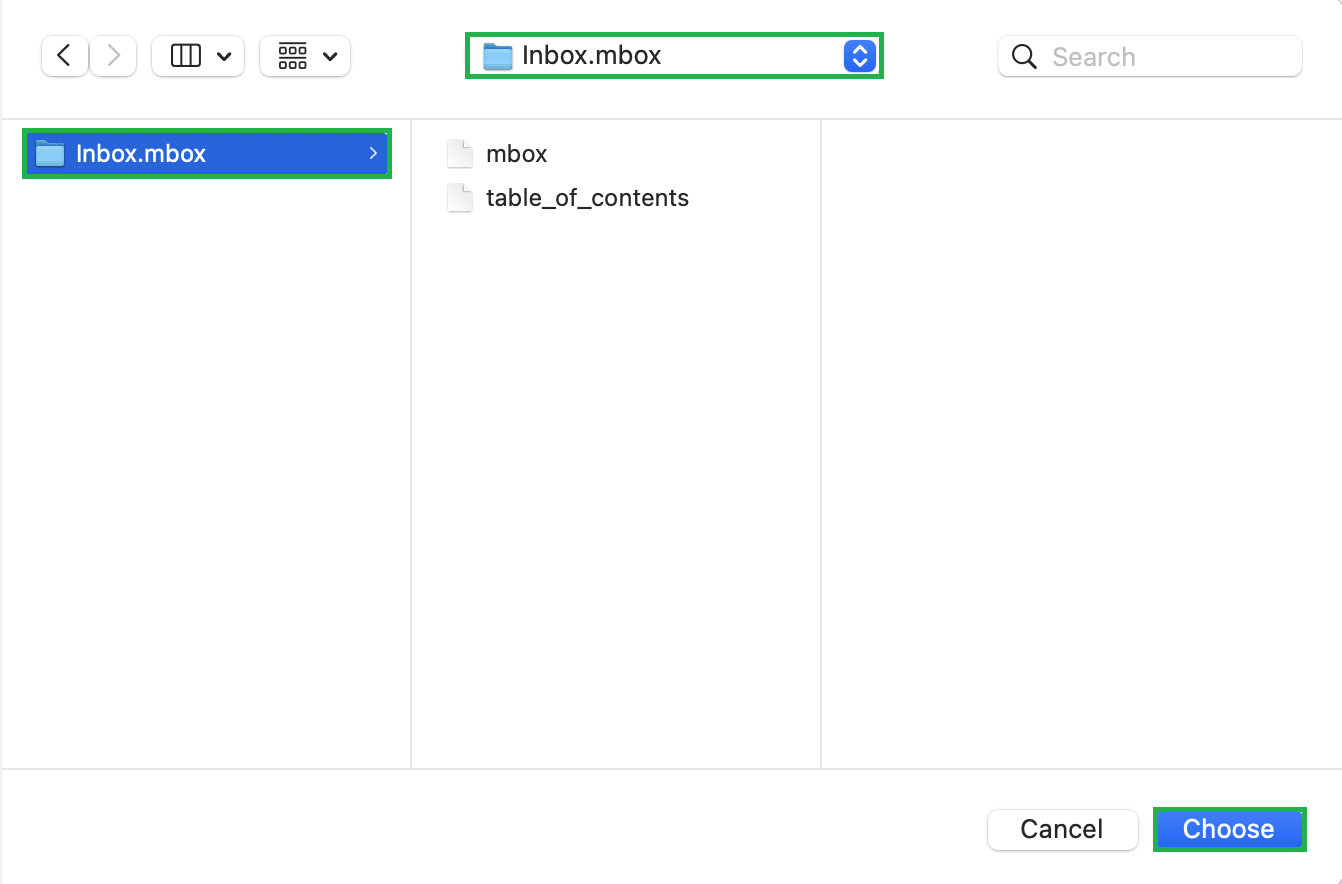
- Select the folder containing your exported backup, then click Choose.
- Once the import has completed, click Done.
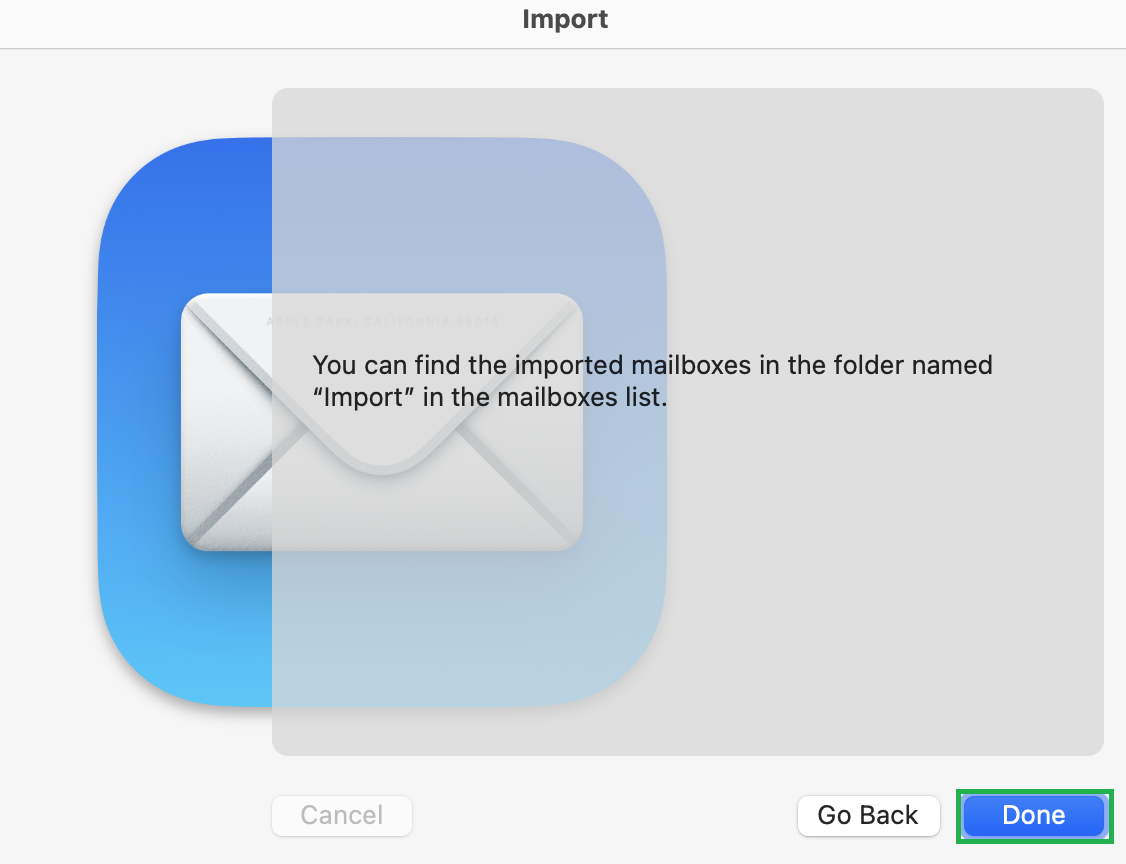
- The imported data will be available under On My Mac in the Import folder. You can now drag folders and messages from the import mailbox to new or existing mailboxes, then delete the Import mailbox.
For more help with Mac Mail, please visit Apple Support.